Sticky Honey Garlic Ribs Recipe – The Ultimate Guide to Tender, Juicy, Finger-Licking Ribs
There are few dishes as comforting and mouthwatering as a rack of sticky ribs. Imagine tender pork ribs coated in a glossy honey garlic glaze, bursting with sweet, savory, and slightly smoky flavors. Whether you’re cooking for your family, preparing a weekend dinner, or hosting a summer BBQ, these Sticky Honey Garlic Ribs will steal the spotlight.
This is not just another rib recipe—it’s a detailed guide that will help you achieve restaurant-quality ribs at home, using simple ingredients and easy steps. By the end, you’ll know how to prepare, cook, glaze, and serve ribs that are so tender they literally fall off the bone.
Why This Recipe Works
- Balanced Flavors – The honey provides sweetness, soy sauce adds umami, garlic gives depth, and brown sugar caramelizes everything into sticky perfection.
- Versatile Cooking Methods – Works in the oven, grill, or slow cooker, so you can adapt it to your kitchen.
- Beginner-Friendly – Even if it’s your first time making ribs, this recipe walks you through every step clearly.
- Perfect for Any Occasion – Whether it’s a casual family meal, a potluck, or game day, these ribs will always impress.
Ingredients You’ll Need
Here’s everything required to make these irresistible honey garlic ribs:
- 2 lbs pork ribs (baby back or spare ribs)
- 1/4 cup honey (for stickiness and natural sweetness)
- 1/4 cup soy sauce (for saltiness and rich flavor)
- 3 tablespoons brown sugar (for caramelization and depth)
- 4 cloves garlic, minced (the main flavor booster)
- 1 tablespoon vinegar (rice vinegar or apple cider vinegar works best)
- 1 teaspoon black pepper (freshly ground for better taste)
- 1 teaspoon chili flakes or sriracha (optional for spice)
- 1 tablespoon cornstarch + 2 tbsp water (optional, for a thicker glaze)
- Fresh parsley or green onions (for garnish)
Step-by-Step Instructions
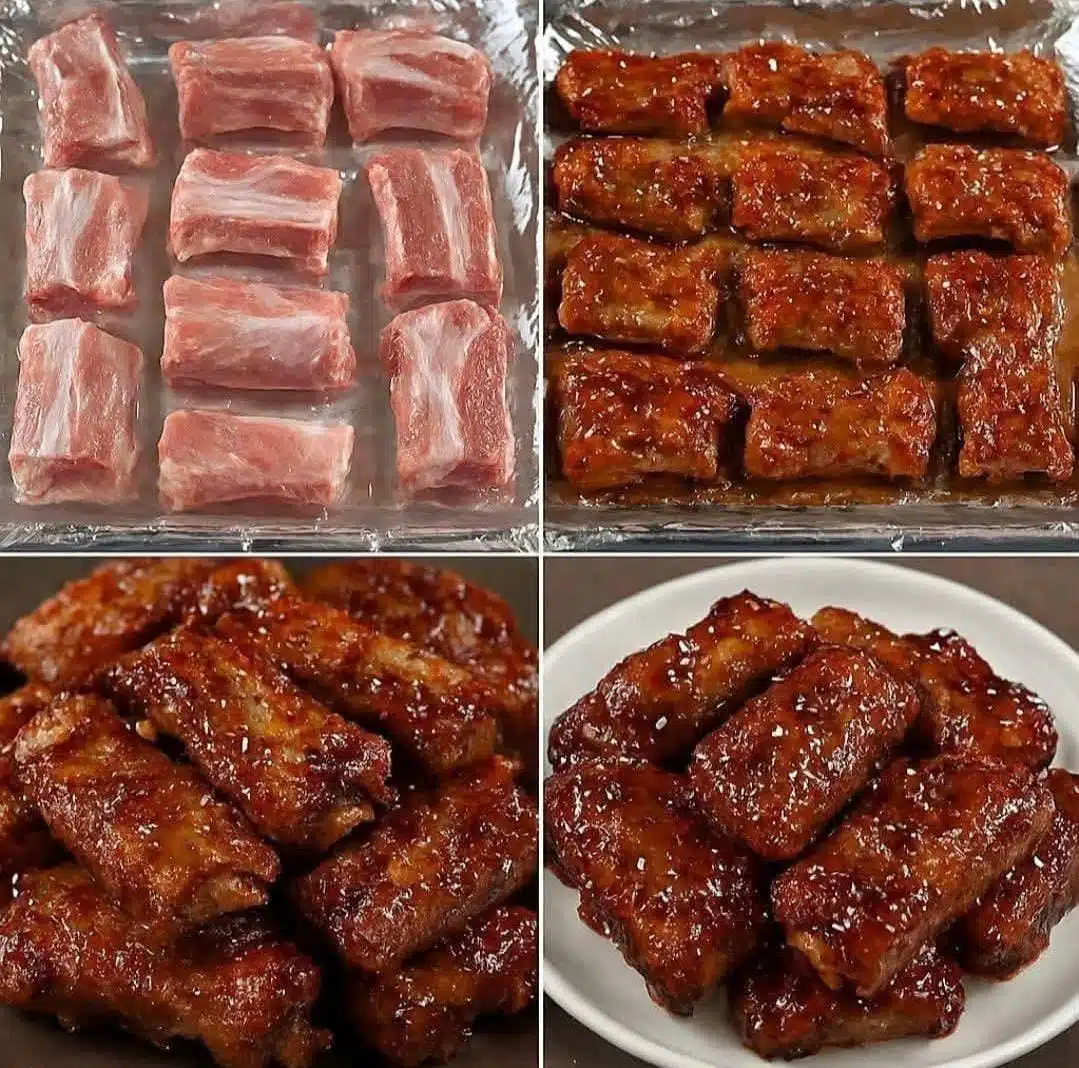
1. Prepare the Ribs
- Remove the thin silver membrane from the back of the ribs. This step makes them more tender.
- Rinse under cold water and pat dry.
- Cut into individual ribs if serving as bite-sized pieces, or leave whole for a dramatic presentation.
2. Make the Marinade
- In a bowl, whisk together honey, soy sauce, brown sugar, garlic, vinegar, and black pepper.
- Reserve half of the marinade for later use (this will become the glaze).
- Place ribs in a large resealable bag or dish, pour the other half of the marinade over them, and refrigerate for at least 2 hours, preferably overnight.
3. Cooking Methods
Oven Method (Best for Home Cooks)
- Preheat oven to 300°F (150°C).
- Line a baking tray with foil and place ribs meat-side up.
- Cover with foil and bake for 2 to 2.5 hours until tender.
- Remove foil, brush with glaze, and bake uncovered for another 20 minutes until sticky.
Grill Method (Smoky & Charred)
- Preheat grill to medium heat.
- Place ribs on the grill and cook for 25–30 minutes, brushing with glaze every few minutes.
- Cook until caramelized, slightly charred, and juicy.
Slow Cooker Method (Effortless & Tender)
- Place ribs in the slow cooker and pour marinade over them.
- Cook on LOW for 6–7 hours or HIGH for 3–4 hours.
- Once done, broil or grill for 5 minutes to achieve that sticky finish.
4. Make the Sticky Glaze
- Take the reserved marinade and pour it into a saucepan.
- Heat until simmering. If you prefer a thicker glaze, add cornstarch slurry.
- Stir until glossy and sticky.
5. Finish & Serve
- Brush ribs generously with glaze.
- Garnish with parsley or green onions.
- Serve hot with extra sauce on the side.
Pro Tips for Perfect Ribs
- Low and Slow Wins – Always cook ribs at a low temperature for a long time for maximum tenderness.
- Don’t Skip the Marinade – Overnight marination gives the best results.
- Glaze at the End – Apply glaze during the last stage of cooking to avoid burning the sugars.
- Foil Trick – Covering ribs with foil keeps them moist and prevents drying.
- Use Baby Back Ribs for Tenderness – Spare ribs are meatier, but baby back ribs are softer and quicker to cook.
What to Serve with Sticky Honey Garlic Ribs
Pair your ribs with sides that balance the sweetness and richness:
- Steamed jasmine rice or fried rice
- Creamy mashed potatoes
- Cornbread or garlic bread
- Coleslaw or fresh salad
- Roasted or grilled vegetables
Variations to Try
- Spicy Honey Garlic Ribs – Add chili paste or sriracha for a spicy kick.
- Asian-Inspired Ribs – Add sesame oil and sprinkle with sesame seeds.
- Smoky BBQ Twist – Mix in smoked paprika or BBQ sauce for smoky depth.
- Sticky Beef Ribs – Replace pork with beef ribs (adjust cooking time accordingly).
Storage & Reheating
- Refrigerate leftovers in an airtight container for up to 3 days.
- Reheat in the oven at 300°F for 10–15 minutes, brushing with fresh glaze.
- Freeze unglazed cooked ribs for up to 2 months, then thaw and glaze before serving.
Nutrition Information (per serving, approx.)
- Calories: 410
- Protein: 25g
- Carbohydrates: 22g
- Fat: 24g
- Sugar: 15g
- Sodium: 520mg
FAQs About Sticky Honey Garlic Ribs
1. Can I make these ribs ahead of time?
Yes! Cook them a day before, refrigerate, and reheat in the oven with glaze before serving.
2. Can I use beef instead of pork ribs?
Absolutely. Beef ribs will work, but they take longer to cook.
3. Do I need to remove the rib membrane?
Yes, removing the membrane makes the ribs tender and easier to eat.
4. Can I bake them faster at a higher temperature?
You can, but they won’t be as tender. Low and slow is always best.
5. Can I use maple syrup instead of honey?
Yes! Maple syrup will give a slightly different flavor but still delicious.
Final Thoughts
These Sticky Honey Garlic Ribs are everything you want in a rib recipe: sweet, savory, garlicky, tender, and irresistibly sticky. With just a handful of ingredients and a little patience, you’ll have a dish that tastes like it came straight out of a gourmet kitchen.
Save this recipe now because once you try it, it will become a family favorite forever.